
HDD Data Rescue - Fixing a HDD with a burnt cable
Last month my girlfriend’s Seagate Barracuda 7200.12 500GB HDD went up in smoke, luckily it was just the drive’s power cable in that dusty PC, but the damage was done and I wasn’t keen on just replacing the cable. After reading a bit into the topic I figured I could do the data rescue myself as a burnt cable and PCB usually just involved replacing the PCB to regain access to all the data. So Igot a replacement disk of the same model and same revision number of the PCB, this is important, removed the PCB of both discs, located the ROM chip, de-soldered it on both and put the chip from the fried PCB onto the new PCB that I installed on the old drive and it did work!
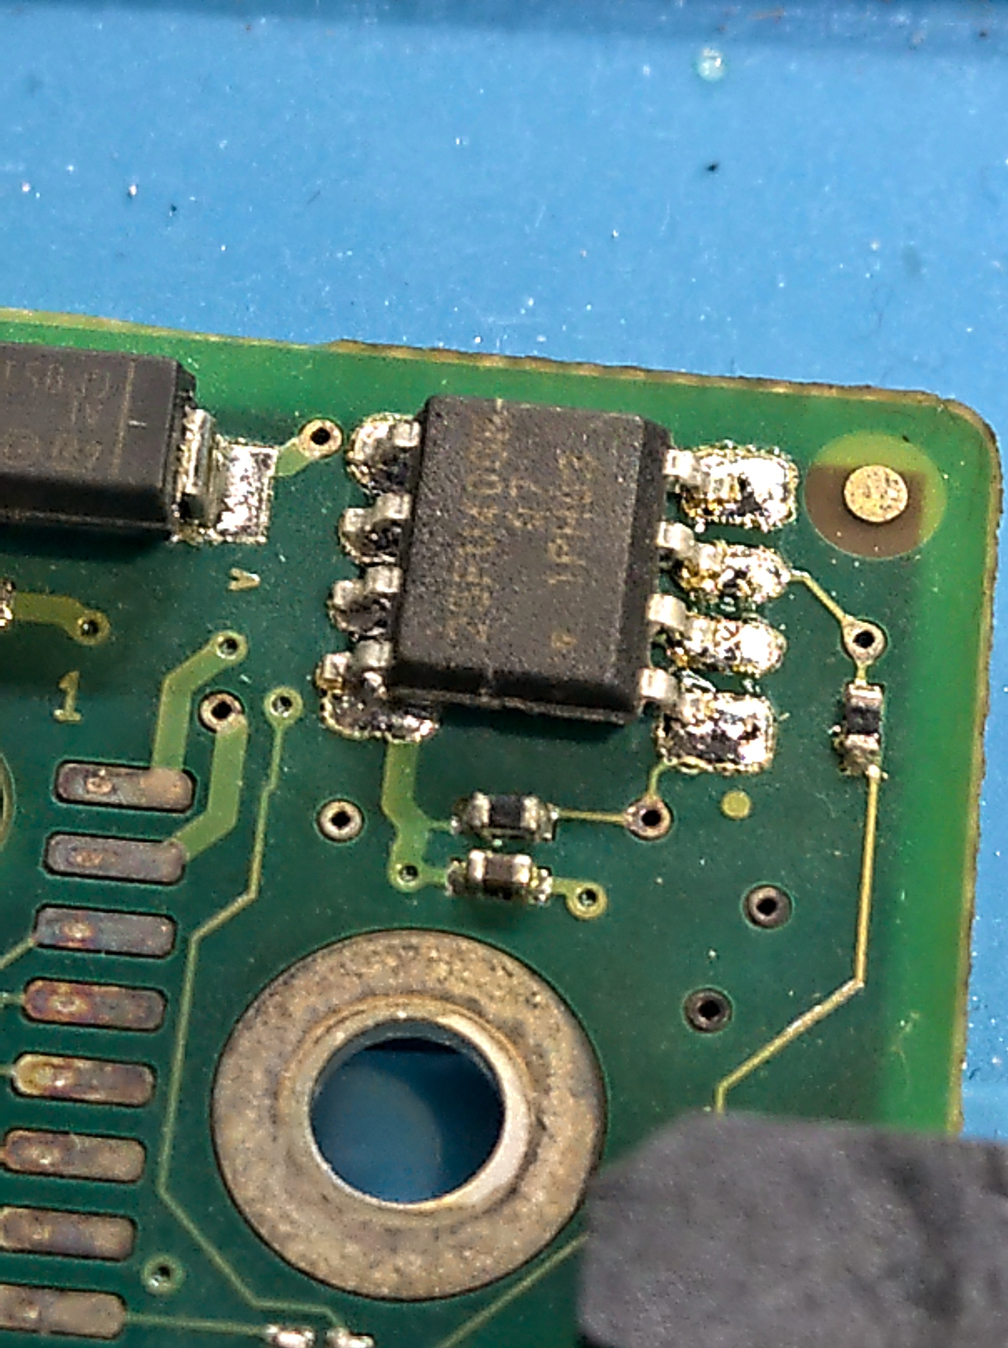
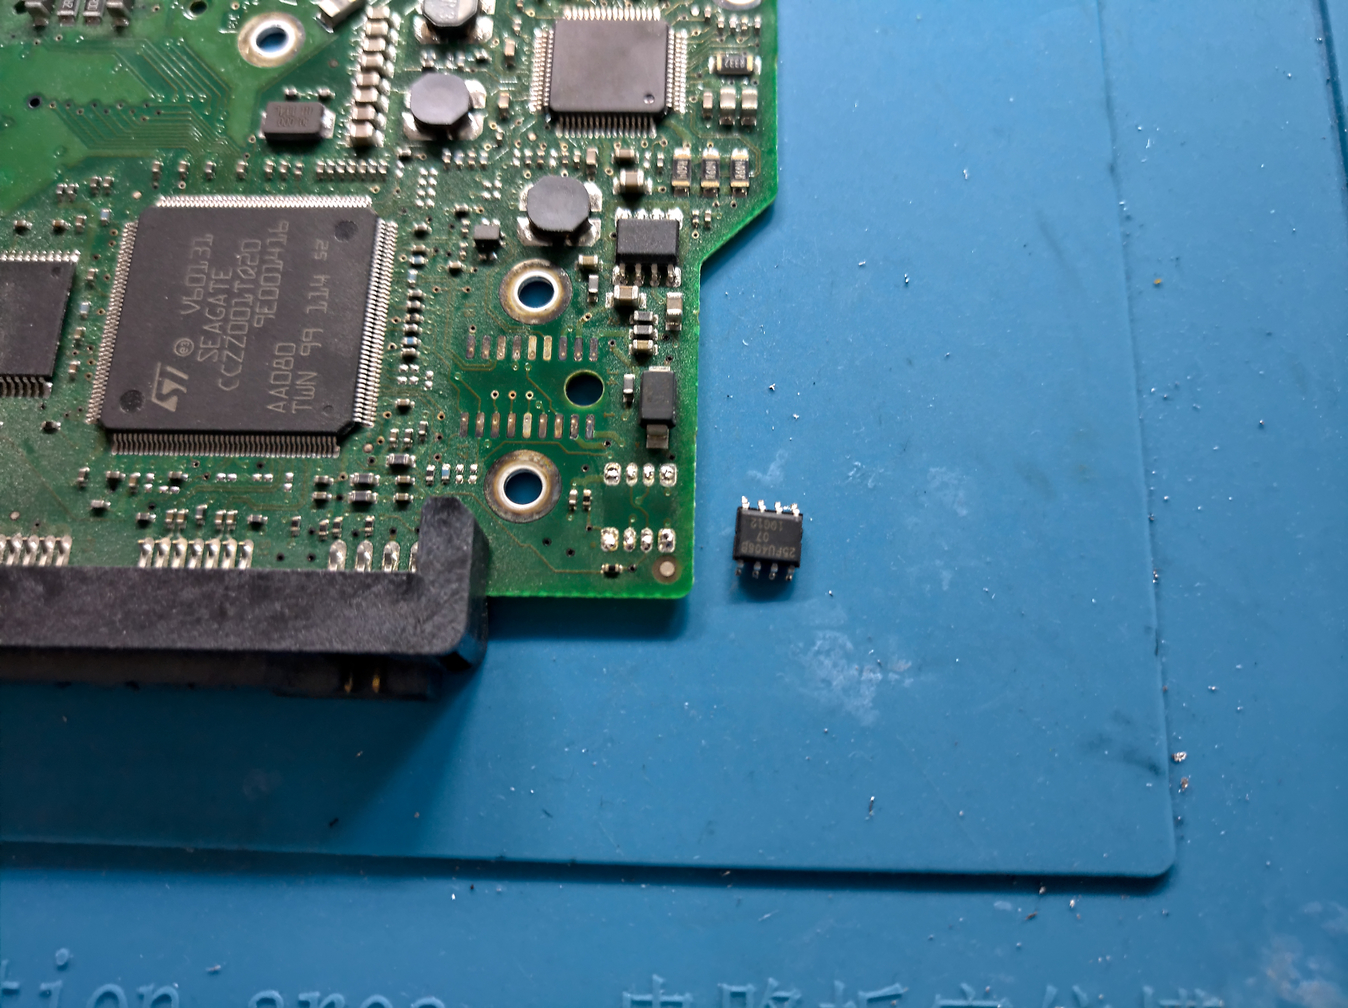
The ROM had a 25FU406B 07 1PHOS written on it. Note that my PCB had another 8-legged IC on it but with a very different number on it. ROMs are easy to spot once you have a general idea about their number patterns.
A SMD soldering station is highly recommended, it’s just so much easier than with a plain soldering iron.
You’ll see on the photos that the ROM isn’t that perfectly on its pads, but I used a magnifying glass to visually confirm there were no shorts and it did work. Sloppy work is just alright, eh?
The disk was then copied onto a fresh disk using ddrescue, part of the SystemRescue Linux distribution and almost no bad sectors were discovered.
Lastly: This whole operation was just to get the data from the HDD. The disk will not be used beyond that and be replaced with a new HDD!
Here’s a few photos with details of the damage, chips etc.
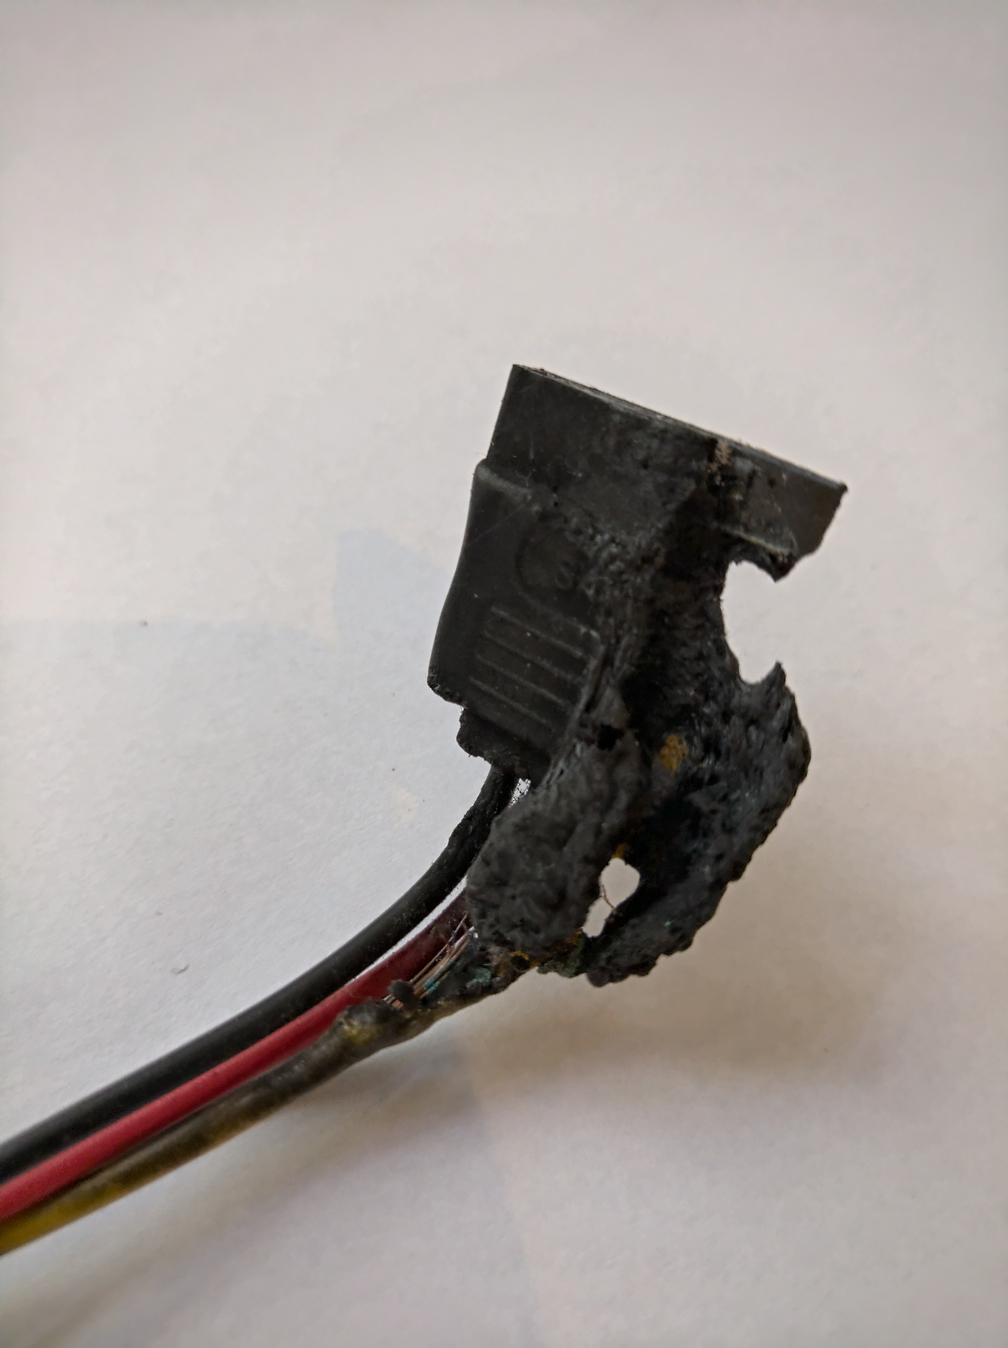 Looks like the cable powering the HDD spontaneously developed a short?

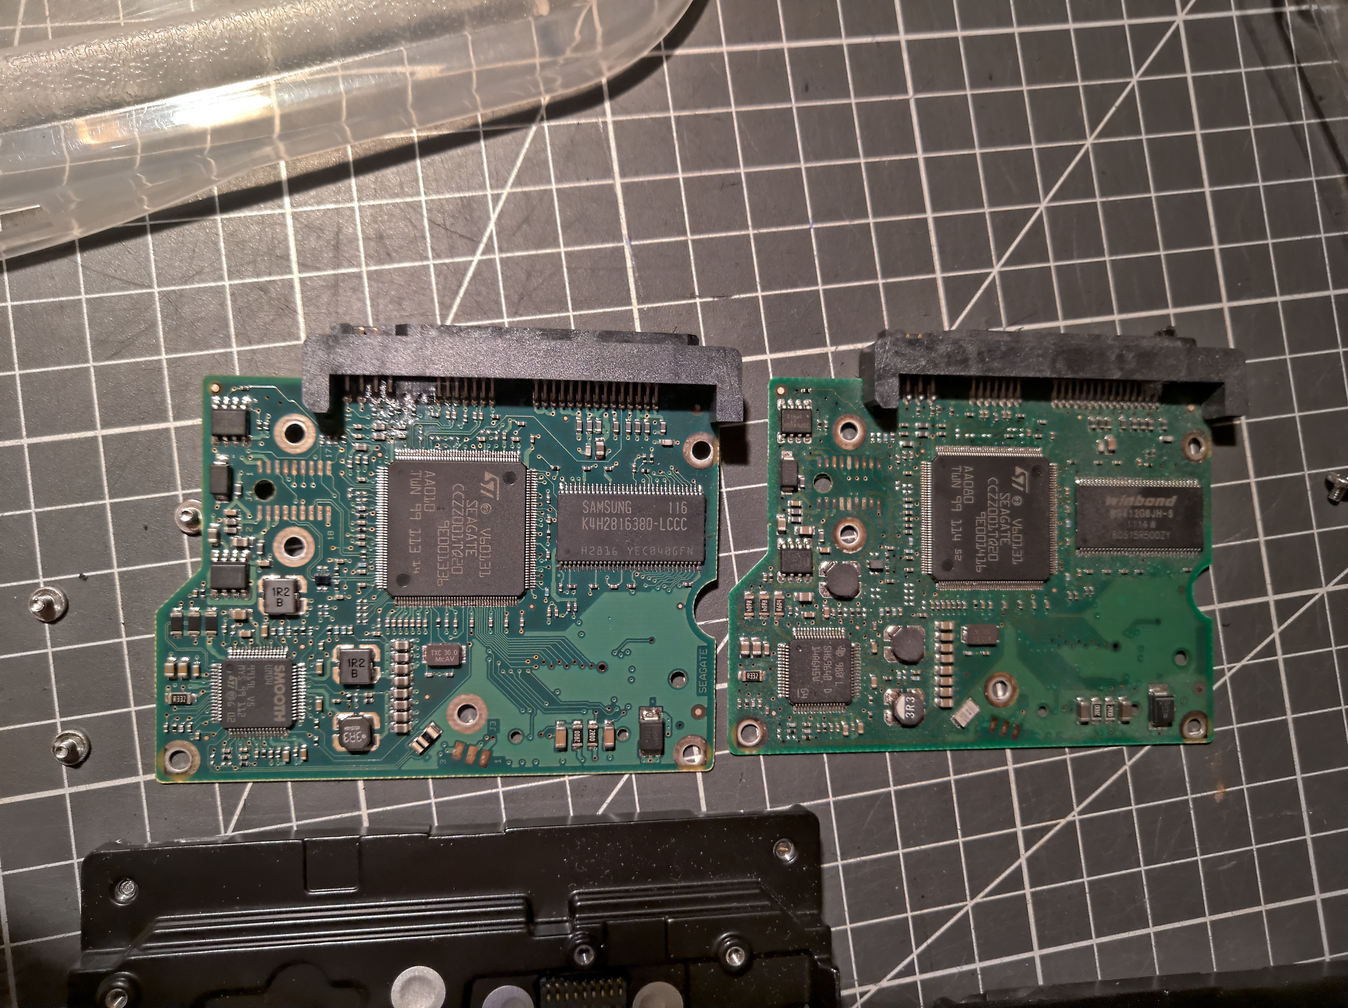
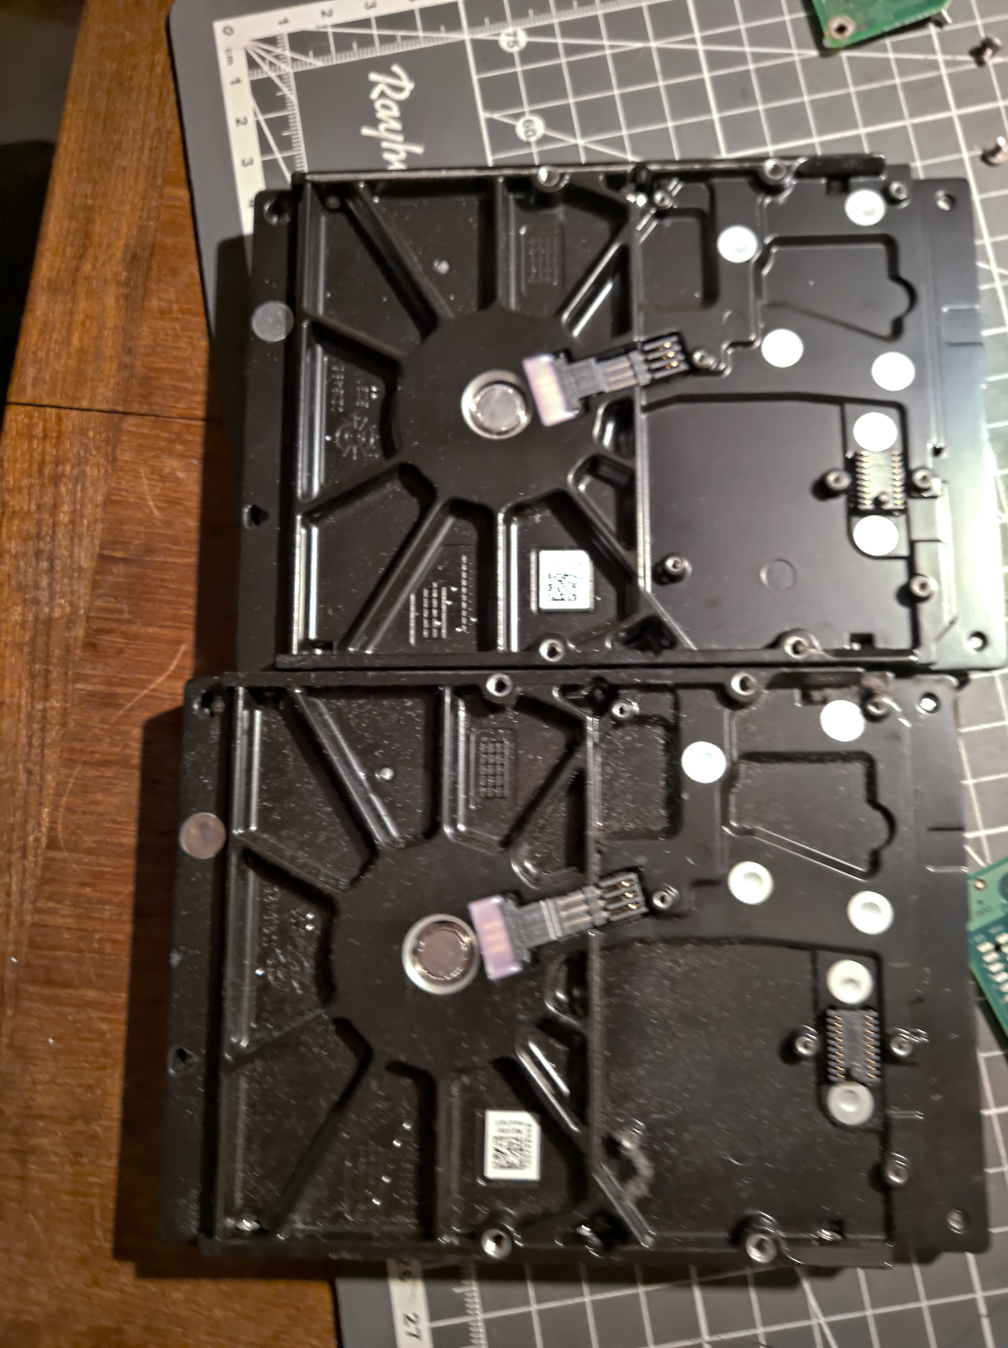 The HDDs in comparison, look at all that dust!
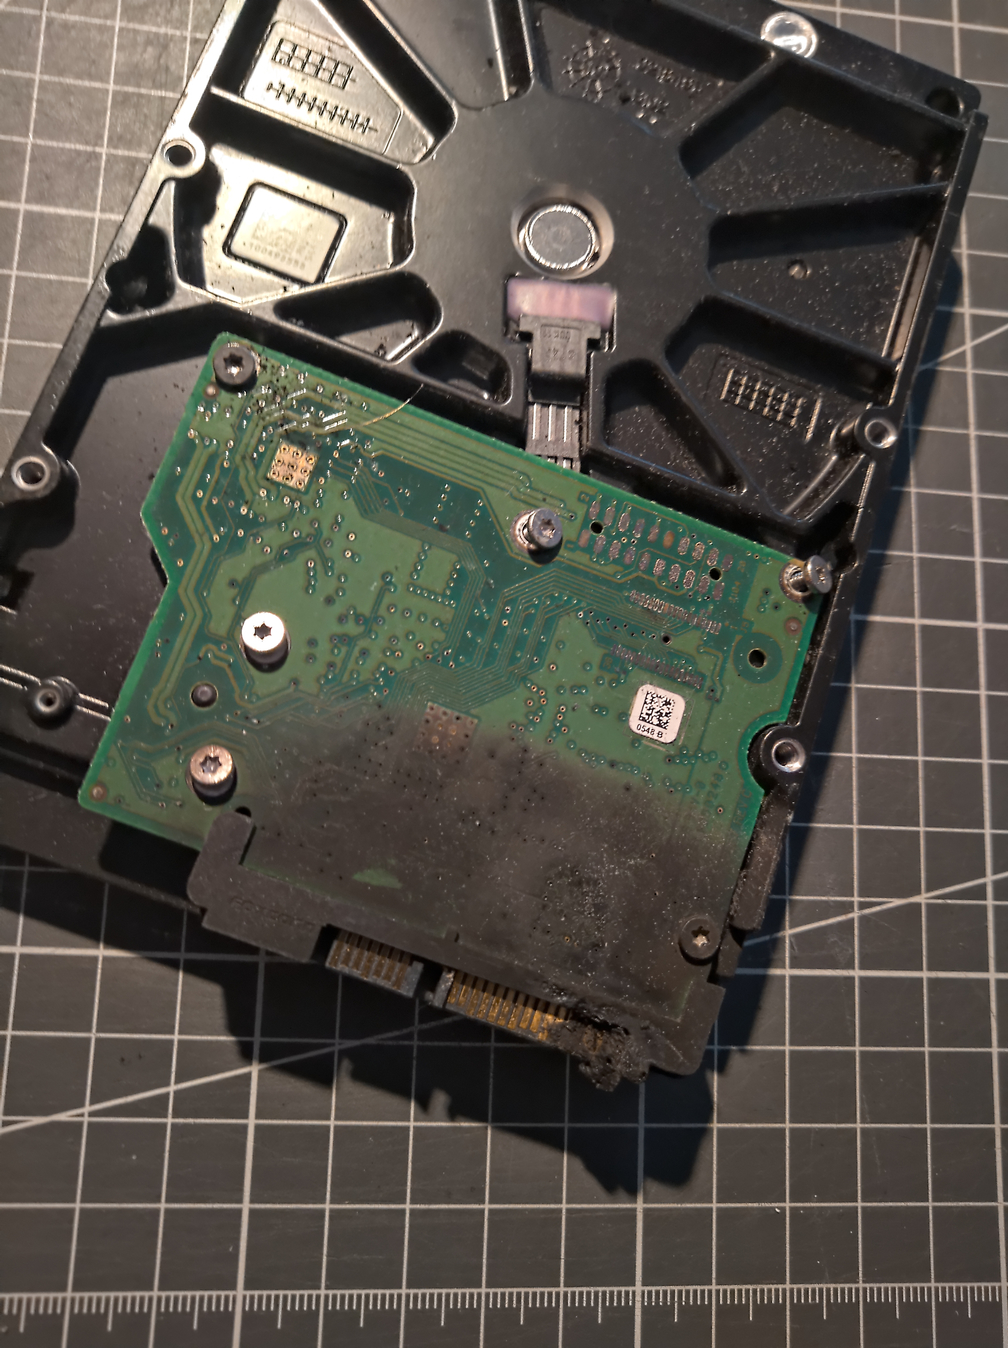
 In case of this PCB the ROM was located at the corner
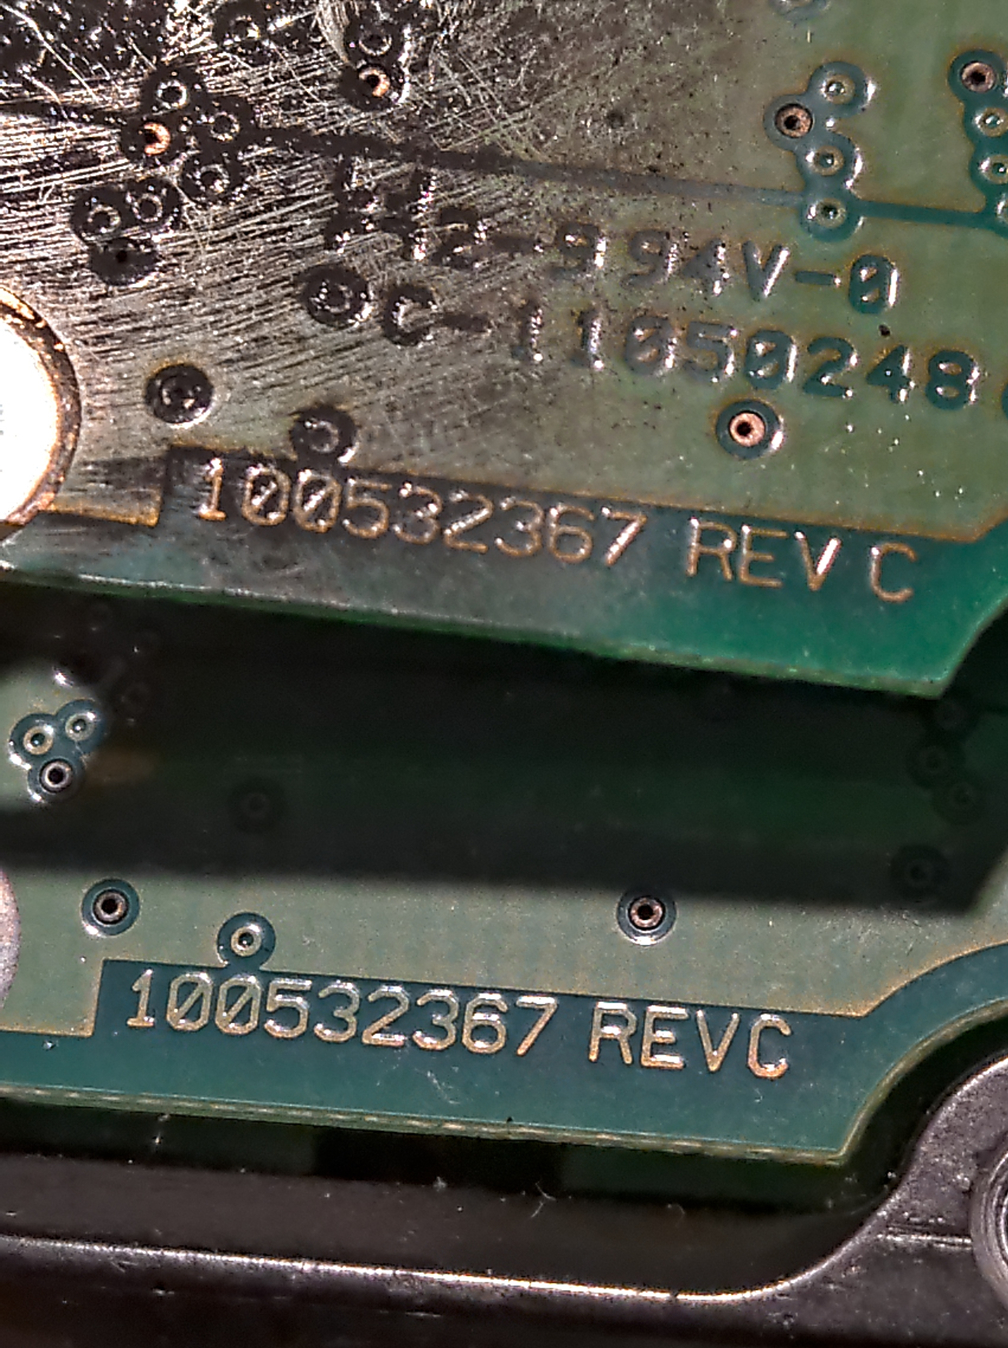
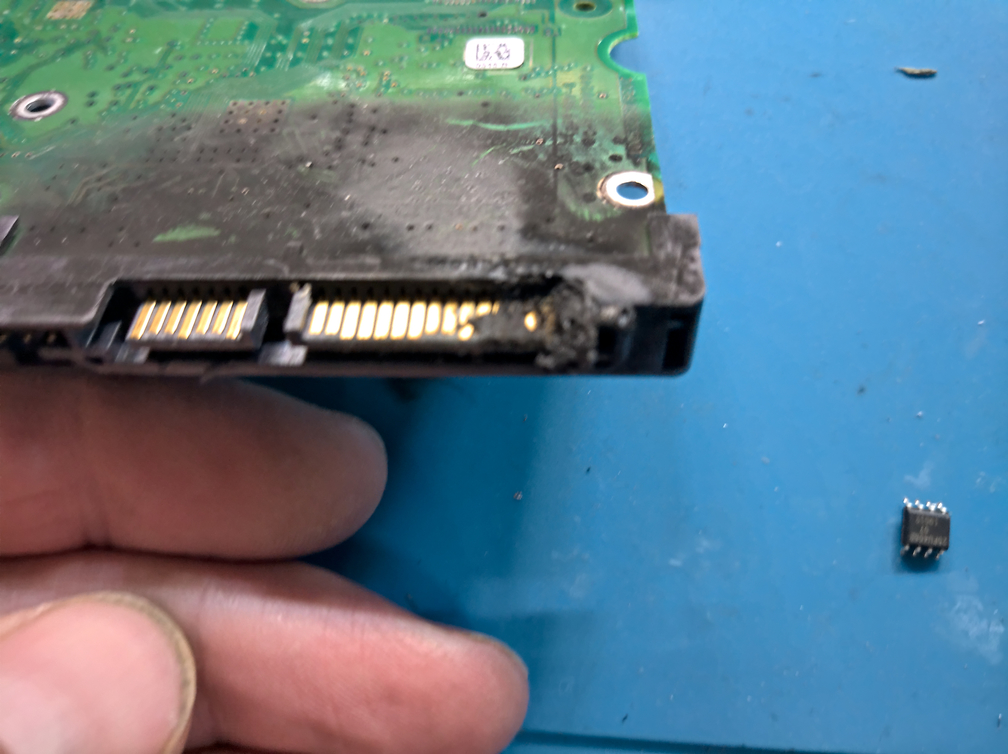
 The meaty side of the PCBs in comparison. Different chips but all we care about is the revision
